Building fabric
The user can run the flow step by step as well (see below for instructions on building HDLs):
Other than building the fabric with the run_FABulous_fabric command as shown in the Quick start, the user can
also build the fabric step by step to suit what they need. We will demonstrate this in the following section from
creating scratch. The following is assuming your current directory is in $FAB_ROOT and all the pre-request set up are
completed.
Create a new project
python3 FABulous.py -c demo
This will create a new project named demo in the current directory.
Running the FABulous shell
python3 FABulous.py demo
And now, we will be in the FABulous shell. After running the above command, the current working directory will be
moved into the project directory, which is demo in this case.
Load the fabric CSV definition file
load_fabric
This command will load in the fabric definition file with the name fabric.csv in the current directory. If the
definition file is in another directory or named differently, the user can specify the path as an argument to the
command. For example: load_fabric fabric2.csv. From this point onwards, all the files read and write commands, will
be relative to where the specified directory of the <definition>.csv is located. For example, if the definition file
located at some_path/<definition>.csv, then all the file’s read and write commands will be relative to some_path.
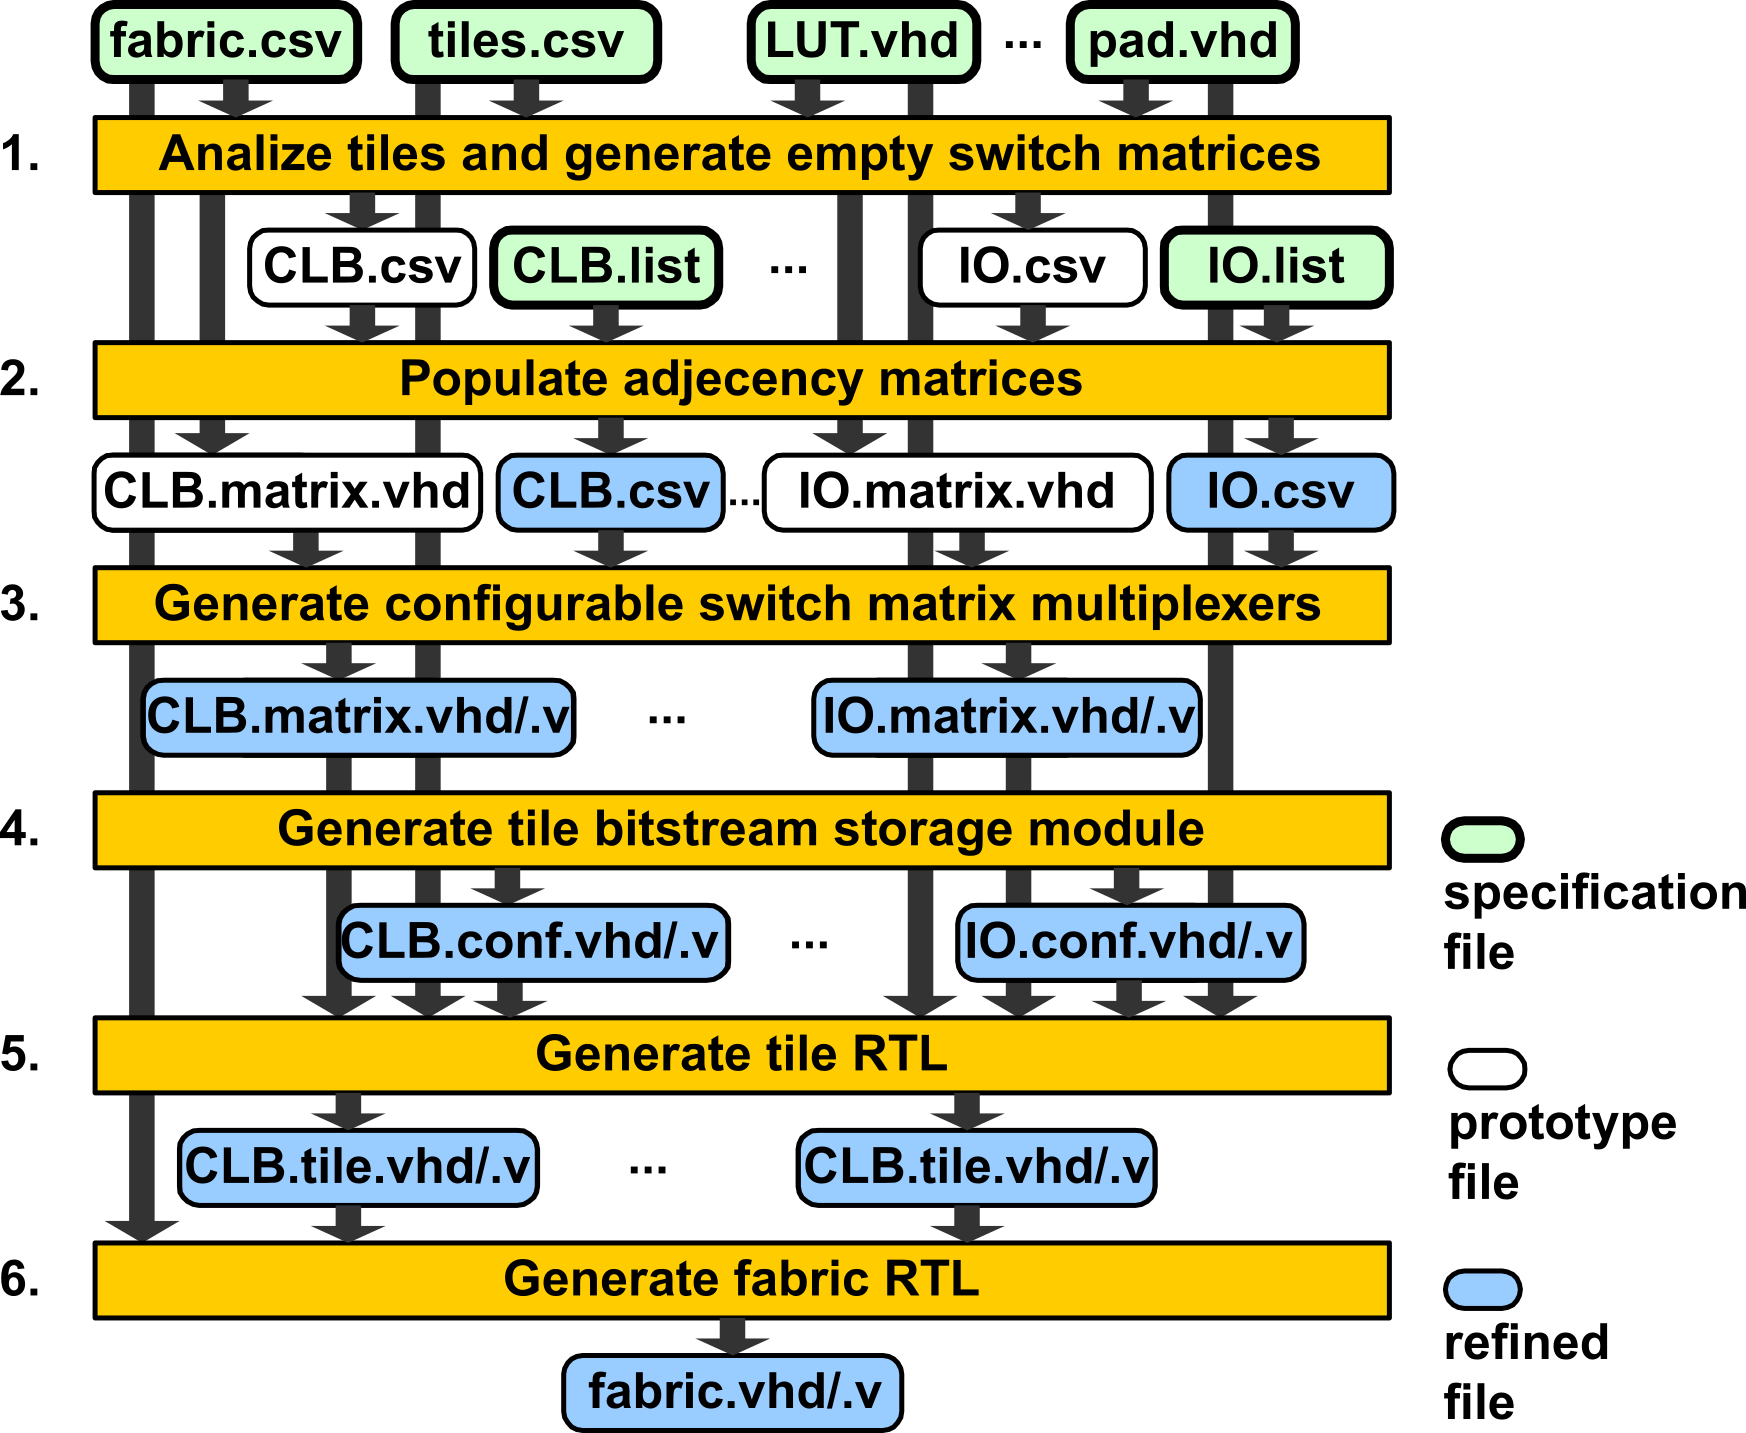
Generate switch matrix
gen_switch_matrix LUT4AB RAM_IO
The above command will generate the switch matrix for the LUT4AB tile and the RAM_IO tile. The switch matrix
generated will be based on the MATRIX entry of the tile definition in the fabric definition file. If the provided
directory is a .list file, then we will generate a switch matrix for the tile, based on the fabric definition file
and add the content in the list file to the matrix. If the provided file is a .csv file, the tool will just load
the data in, and generate a switch base on the data. Finally, if providing a .v or .vhdl file, the tool will skip
matrix generation for the tile, and will use the provided file as the switch matrix.
Note
During model generation, the given file for
MATRIXentry needs to be either a.listor.csvfile.
Generate the configuration storage (RTL).
gen_config_mem LUT4AB RAM_IO
The above command will generate the configuration storage for the LUT4AB tile and the RAM_IO tile. If a
<tile>_ConfigMem.csv file does not exist in the Tile/<tile> directory, then the command will generate a new
<tile>_ConfigMem.csv file.
Generate the actual tiles (RTL).
gen_tile LUT4AB RAM_IO
The above command will generate the actual tiles for the LUT4AB tile and the RAM_IO tile.
All the files generated will be located in the respective tile directory. i.e RTL for LUT4AB will be in Tile/LUT4AB/
We will need to run the above commands for all the tiles to get all the RTL of all the tiles, which is quite tedious to do. As a result, the following command will generate all the RTL for all the tiles in the fabric including all the super tiles within the fabric.
gen_all_tile
Generate the entire fabric (RTL).
gen_fabricGenerate Verilog top wrapper.
gen_top_wrapperGenerate the nextpnr model.
gen_model_npnrGenerate the VPR model.
gen_model_vprGenerate the meta data list for FASM –> Bitstream
gen_bitStream_spec